Preamble:
In this tutorial we will go over a practical guide to development using the ESP32-WROVER while working in Eclipse and using the ESP-IDF framework. Specifically, near the end we’ll explore how to use the ESP-IDF’s menuconfig tool to allow us to develop while using the additional memory available to the ESP32-WROVER.
This tutorial arose out of our experiments with the ESP32 and attempting to create a system where Bluetooth, WiFi, and some Amazon Web Services support could all operate in tandem. We started development work on the ESP32-WROOM module, but found that we were maxing out the available RAM. Ordering a WROVER dev kit, of course we found that it wasn’t as simple as just building to a new board and expecting everything to work. Whereas previously we worked in the PlatformIO/Atom IDE, we found that we simply did not have enough control over the build process to utilize the extra ram available to the ESP32-WROVER. We instead opted to use the ESP-IDF directly, and set up Eclipse as a working development environment. This tutorial follows the steps we took, and details how anybody can get started from the ground up for ESP32-WROVER development.
Now before we begin, here’s the assumptions we’re making:
- You are developing using something running Mac OS. Most all of these steps will be similar on Linux, but we promise nothing!
- You know your way around a computer, are comfortable with building to integrated devices, and have some experience developing with C.
- You have a basic familiarity with Eclipse
- Hearing the phrase “Build using the command line” doesn’t send you running away at top speeds from this tutorial
- You are using a dev kit that utilizes the ESP32-WROVER (Example below), as opposed to the ESP32-WROOM module.

On top of that, here’s the current versions of just about everything as of the time of writing this tutorial. It’s very possible that certain steps or wording may have changed by the time you read this, so be prepared to adapt!
- macOS High Sierra
- Eclipse Oxygen.2 Release (4.7.2)
- Espressif ESP32 WROVER KIT V3 (found here: https://www.adafruit.com/product/3384)
- ESP-IDF Release v3.0 RC1
Finally, before we jump in, let me just say that I am by no means an ESP32 systems expert and I can’t personally speak to the nitty-gritty workings of everything in this tutorial. It is designed purely as a practical guide to begin development efforts. If you are interested in the finer details of the ESP32 as a system I suggest you look into Neil Kolban’s wonderfully exhaustive book on the topic.
Getting Started – Installing the Toolchain
This part of the tutorial is based on the official ESP-IDF tutorial which you can find here: http://esp-idf.readthedocs.io/en/latest/get-started/macos-setup.html it may be more up to date than this guide. Simply put, we need to setup the ESP32 Toolchain which allows us to properly turn our source code into working applications that run on the ESP32.
First thing’s first, Boot up a new Terminal Window and install pip (If you haven’t already) by entering
sudo easy_install pip
Next, install pyserial with the following command:
sudo pip install pyserial
With luck, that should all be installed without too much hassle. Next, download the ESP32 Toolchain for Mac from here https://dl.espressif.com/dl/xtensa-esp32-elf-osx-1.22.0-80-g6c4433a-5.2.0.tar.gz. This link may be old by the time you read it, but you can find the most up to date Toolchain from the guide linked at the start of this section.
Go ahead and extract that archive to a new folder within your user directory and call it “esp”. The contents should now all be located in “~/esp/xtensa-esp32-elf” (Make sure you didn’t accidentally extract them to a subfolder like “esp/xtensa-esp32-elf/xtensa-esp32-elf-osx-1.22.0-80-g6c4433a-5.2.0” instead!)
Next we’re going to change our PATH environment variable to also point to the binaries within this toolchain. Modify your ~/.bash_profile file and add the following to the end: (If .bash_profile doesn’t exist, go ahead and create it)
# Add Xtensa Toolchain
PATH="/Users/mike_d/esp/bin:/Users/REPLACE_ME_WITH_YOUR_USERNAME/esp/xtensa-esp32-elf/bin:${PATH}"
export PATH
Make sure you remember to actually add your user account name in the snippit above!
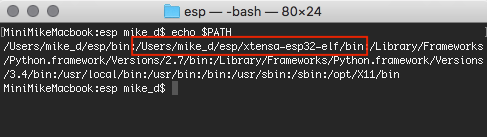
Save it, and open up a new Terminal Window. To see if it worked, check to see if it appears when you enter the command:
echo $PATH
You should be able to see your new addition to the Path in the resulting output. Don’t worry too much if your Path doesn’t look much like mine. Multiple versions of Python have really done a number on me, and there’s still some traces of my failed attempts to get this all working sitting around in there.
Right so that’s good! We now have access to the Toolchain. Next up lets get the ESP-IDF itself.
ESP-IDF: Installing and Testing from the Terminal
Next up we need to download the ESP-IDF. Basically, this is a complex framework that Espressif has made as the official development framework for all ESP32 work. It includes libraries for just about everything you could hope to do with the ESP32, and has numerous build and configuration tools that make our lives a hell of a lot easier. This section is based on the official tutorial which you can find here http://esp-idf.readthedocs.io/en/latest/get-started/index.html#get-started-get-esp-idf
First you need to get the ESP-IDF framework itself. You can either head on over to https://github.com/espressif/esp-idf and download an archive with a stable release build, or else you can use git and clone the latest stable branch from their repository. To do the latter, use the following command from the terminal:
cd ~/esp
git clone --recursive https://github.com/espressif/esp-idf.git
Whether you used git or manually extracted a release repo, you should now have an “~/esp/esp-idf” folder that contains the ESP-IDF itself.
Next, lets add a new variable to our Environment that contains the path to the ESP-IDF. This variable must be called IDF_PATH. Once again open up the ~/.bash_profile file and add the following to the end: (Once again, remember to change the REPLACE_ME value with your actual user account name!)
# Add the ESP-IDF Path to a new Variable
IDF_PATH="/Users/REPLACE_ME_WITH_YOUR_USERNAME/esp/esp-idf/"
export IDF_PATH
You can test to see if the variable exists by opening up a new window and trying the command “echo $IDF_PATH”. If everything works alright, the path should be printed to your terminal.
With me so far? Nice! You should be all set up to actually build something to your ESP32 at this point! Lets go ahead and do that through the command line. First off, Go ahead and download or clone this example from the ESP-IDF. https://github.com/espressif/esp-idf/tree/d8c8050/examples/get-started/hello_world. Make sure you Place it in your esp folder (Example: “~/esp/hello_world”)
From here, we need to actually be able to connect to the ESP-WROVER. This is where things get tricky, and following the official tutorials might result in errors that look like this:
Connecting........_____....._____....._____....._____....._____....._____....._____....._____....._____....._____

A fatal error occurred: Failed to connect to ESP32: Timed out waiting for packet header
*** [upload] Error 2
I struggled with this one for a very long time. It’s especially bad when you’re using an IDE like PlatformIO and you don’t get the power of configuring things yourself through the menuconfig tool. Suggestions on google ranged from changing jumpers on pins, to holding buttons in specific orders, to resoldering the entire module. Finally, I discovered a strange quirk about the ESP32: It actually registers on two different USB connections. In my case, these were “/dev/cu.usbserial-14100” and “/dev/cu.usbserial-14101.” If you encounter any trouble building to the WROVER, try a different USB connection. /dev/cu.usbserial-14101 worked for me, whereas the default /dev/cu.usbserial-14100 did not.
Right, at any rate, in order to discover what ports you need to connect through first Plug in your ESP32 WROVER Dev Kit using the USB ART port and then open up your terminal and enter the following command:
ls /dev/cu.*
You should see a bunch of listings, like so:

Take note of the listing(s) with “usbserial”, write them down or copy them somewhere if need be. You’ll need them shortly. Next, while in your command terminal, navigate to your hello_world project that you added before and open the menuconfig tool like so:
cd ~/esp/hello_world
make menuconfig
You’ll get a fancy retro GUI that looks like this:

This tool here is the menuconfig. The only thing we need to do in it for now is to change the Serial upload port the the port we wrote down before. You can do that by moving through the GUI menus and going to Serial Flasher Config -> Default Serial Port and then pasting the port from before (If you have two ports, try the one that ends with a “1”)

Press OK, Exit, Save, OK, Exit.
To confirm that all worked… while sitting on the command line in the hello_world folder verify that there is both a sdkconfig file and a sdkconfig.old file.

Next up, lets build the damned thing to the ESP! Simply type the following command and then watch the magic.
make flash
A fresh cup of coffee later, you have yourself a compiled and uploaded program on your ESP32! Congrats!

But how do you know if it’s all working? Well, for that your going to need to open up your monitor. Try the following command:
make monitor
And you’ll start getting all of your program output in a nice human readable format. Nice. That wasn’t so bad!

Thing is though, who wants to develop by endlessly executing command line arguments!? Neckbeards, that’s who. And not being a neckbeard myself, I believe we should just be able to push a button and have our compiled code on the ESP. That’s where Eclipse comes in… And that’s what we’re going to set up next.
Setting Up Eclipse for ESP32 Development
First of all, let me say that this is one area where the official tutorials led me astray. I’m still not sure what I did wrong exactly, but it wasn’t until I followed this video tutorial that I got it all working. I don’t believe I could do a better job of describing the step by step process, so I’ll just embed the video here.
Getting 4MB of extra Memory from the WROVER
And finally, there’s just one more step before we can really start developing using the WROVER.
First, let’s take a look at something. Open up a working ESP32 project in Eclipse (Such as the one you set up in the above video) and modify the main method to just be the following:
void app_main(void) {
while (true) {
printf(“Available Heap Space: %d\n”, esp_get_free_heap_size());
vTaskDelay(300 / portTICK_PERIOD_MS);
}
}
Build it, Flash it, and open up the monitor with “make monitor”…

What’s this! Only 300,000 bytes of available memory! This is not what we paid for! We might be able to make WiFi, Bluetooth, and external connection services work with this much memory, given the opportunity to make a few efficiency improvements here and there… But it’s going to be close. The Bluetooth stack alone gobbles up about 100k. So what do we do? We know there’s more memory on the chip…
Well as it turns out, all we actually need to do is change a flag in make menuconfig.
So open up your terminal, navigate to the project folder, and call “make menuconfig”
Browse to Component Config -> ESP32-Specific and enable Support for External, SPI-connected RAM by pushing the “y” key while hovering over it.

This opens up the SPI RAM config option. I definitely recommend you go through this as need be, as there’s some nuance as to how the WROVER uses the “external” PSRAM. For now though, just enabling this option is enough. Save and exit the menuconfig.
Now, Rebuild and Flash your project, Open up the serial monitor with “make monitor” again and behold the fruits of your labor:

And there you have it! You should now be fully set up for some serious IoT development. I hope this helped somebody out there, and I do apologize for any missing steps. If you notice anything wrong at all, or simply feel like praising me for my incredible ability to plagiarize from other existing tutorials, feel free to reach out to me at daoust@advanceworx.ca.
Happy developing!